
So, one among million other things that I have wanted to cook is fresh Pita breads at home. And guess what…I made it yesterday. The entire process felt so magical especially for a beginner-level baker like me. Starting off with a simple yeast dough that puffs up like a balloon towards the end of the process was such a joy to watch with my side-kick(my son) who was equally excited and stood beside me as I cooked these on the stove. Its a very easy recipe which I found on youtube but I like to be adventurous at times so changed it a bit.
I have managed to post this recipe sooner than I thought(Thanks to Instagram). A few lovely women on Instagram appreciated me and wanted to know how I made it. Luckily, I also have pictures and short videos from yesterday… To tell you the truth, I always like to click pictures and videos for such recipes only because I can go back to refer when I am making it again. And as an added bonus, I get to use it for the blog when I want to!
SO here goes…
This recipe will make about 14-16 medium sized breads!
3 cups of all purpose flour or you can use whole wheat flour! ( I used 2 cups of AF and 1 cup wheat flour)
1/2 half cup fine semolina
1 tablespoon milk powder
1 tblspn instant yeast
1 Tspn sugar/ honey
1/2 tblspn salt
Some warm water
1/4th cup extra virgin olive oil and more for rubbing on the dough later
- In a wide bowl, mix flour, semolina, salt and olive oil. In another small bowl, add little warm water(shouldn’t hurt your finger when you dip in) add yeast and sugar and dissolve well. Wait for a few minutes and you will see some foaming. Now add this to the dough. Now, I know you can add instant yeast directly to dry ingredients but I prefer doing it this way so I can be sure the yeast has activated. Feel free to add it directly to flour if you have worked with yeast previously.
- Mix very well and make a nice dough by adding warm water. And at first its okay to add little extra water so you get nice sticky dough. Then take it off the bowl and knead knead knead for a good 15 minutes or so while adding drops of warm water every now and then. You will be pleasantly surprised to see a beautifully smooth dough as you keep kneading. When you get a nice bouncy feeling to the dough and a sore feeling to your arms, oil the bowl well and transfer the dough back to the bowl. Also coat the surface of dough with oil.
3. Cover and allow to rise for an hour or more.
Once it’s risen well, punch the dough and take out all the air. So therapeutic I tell you!
- Now divide dough into preferred sizes and dust some flour on the work surface or your regular roti board. Start rolling the balls into preferred shape round or oval. Roll it thicker than chapatis. Like a paratha maybe!
- Arrange each rolled out bread onto kitchen towels side by side. Cover and leave this to rise for another 30 mins. Might not rise too much but I read that this step helps with puffing up later while cooking.
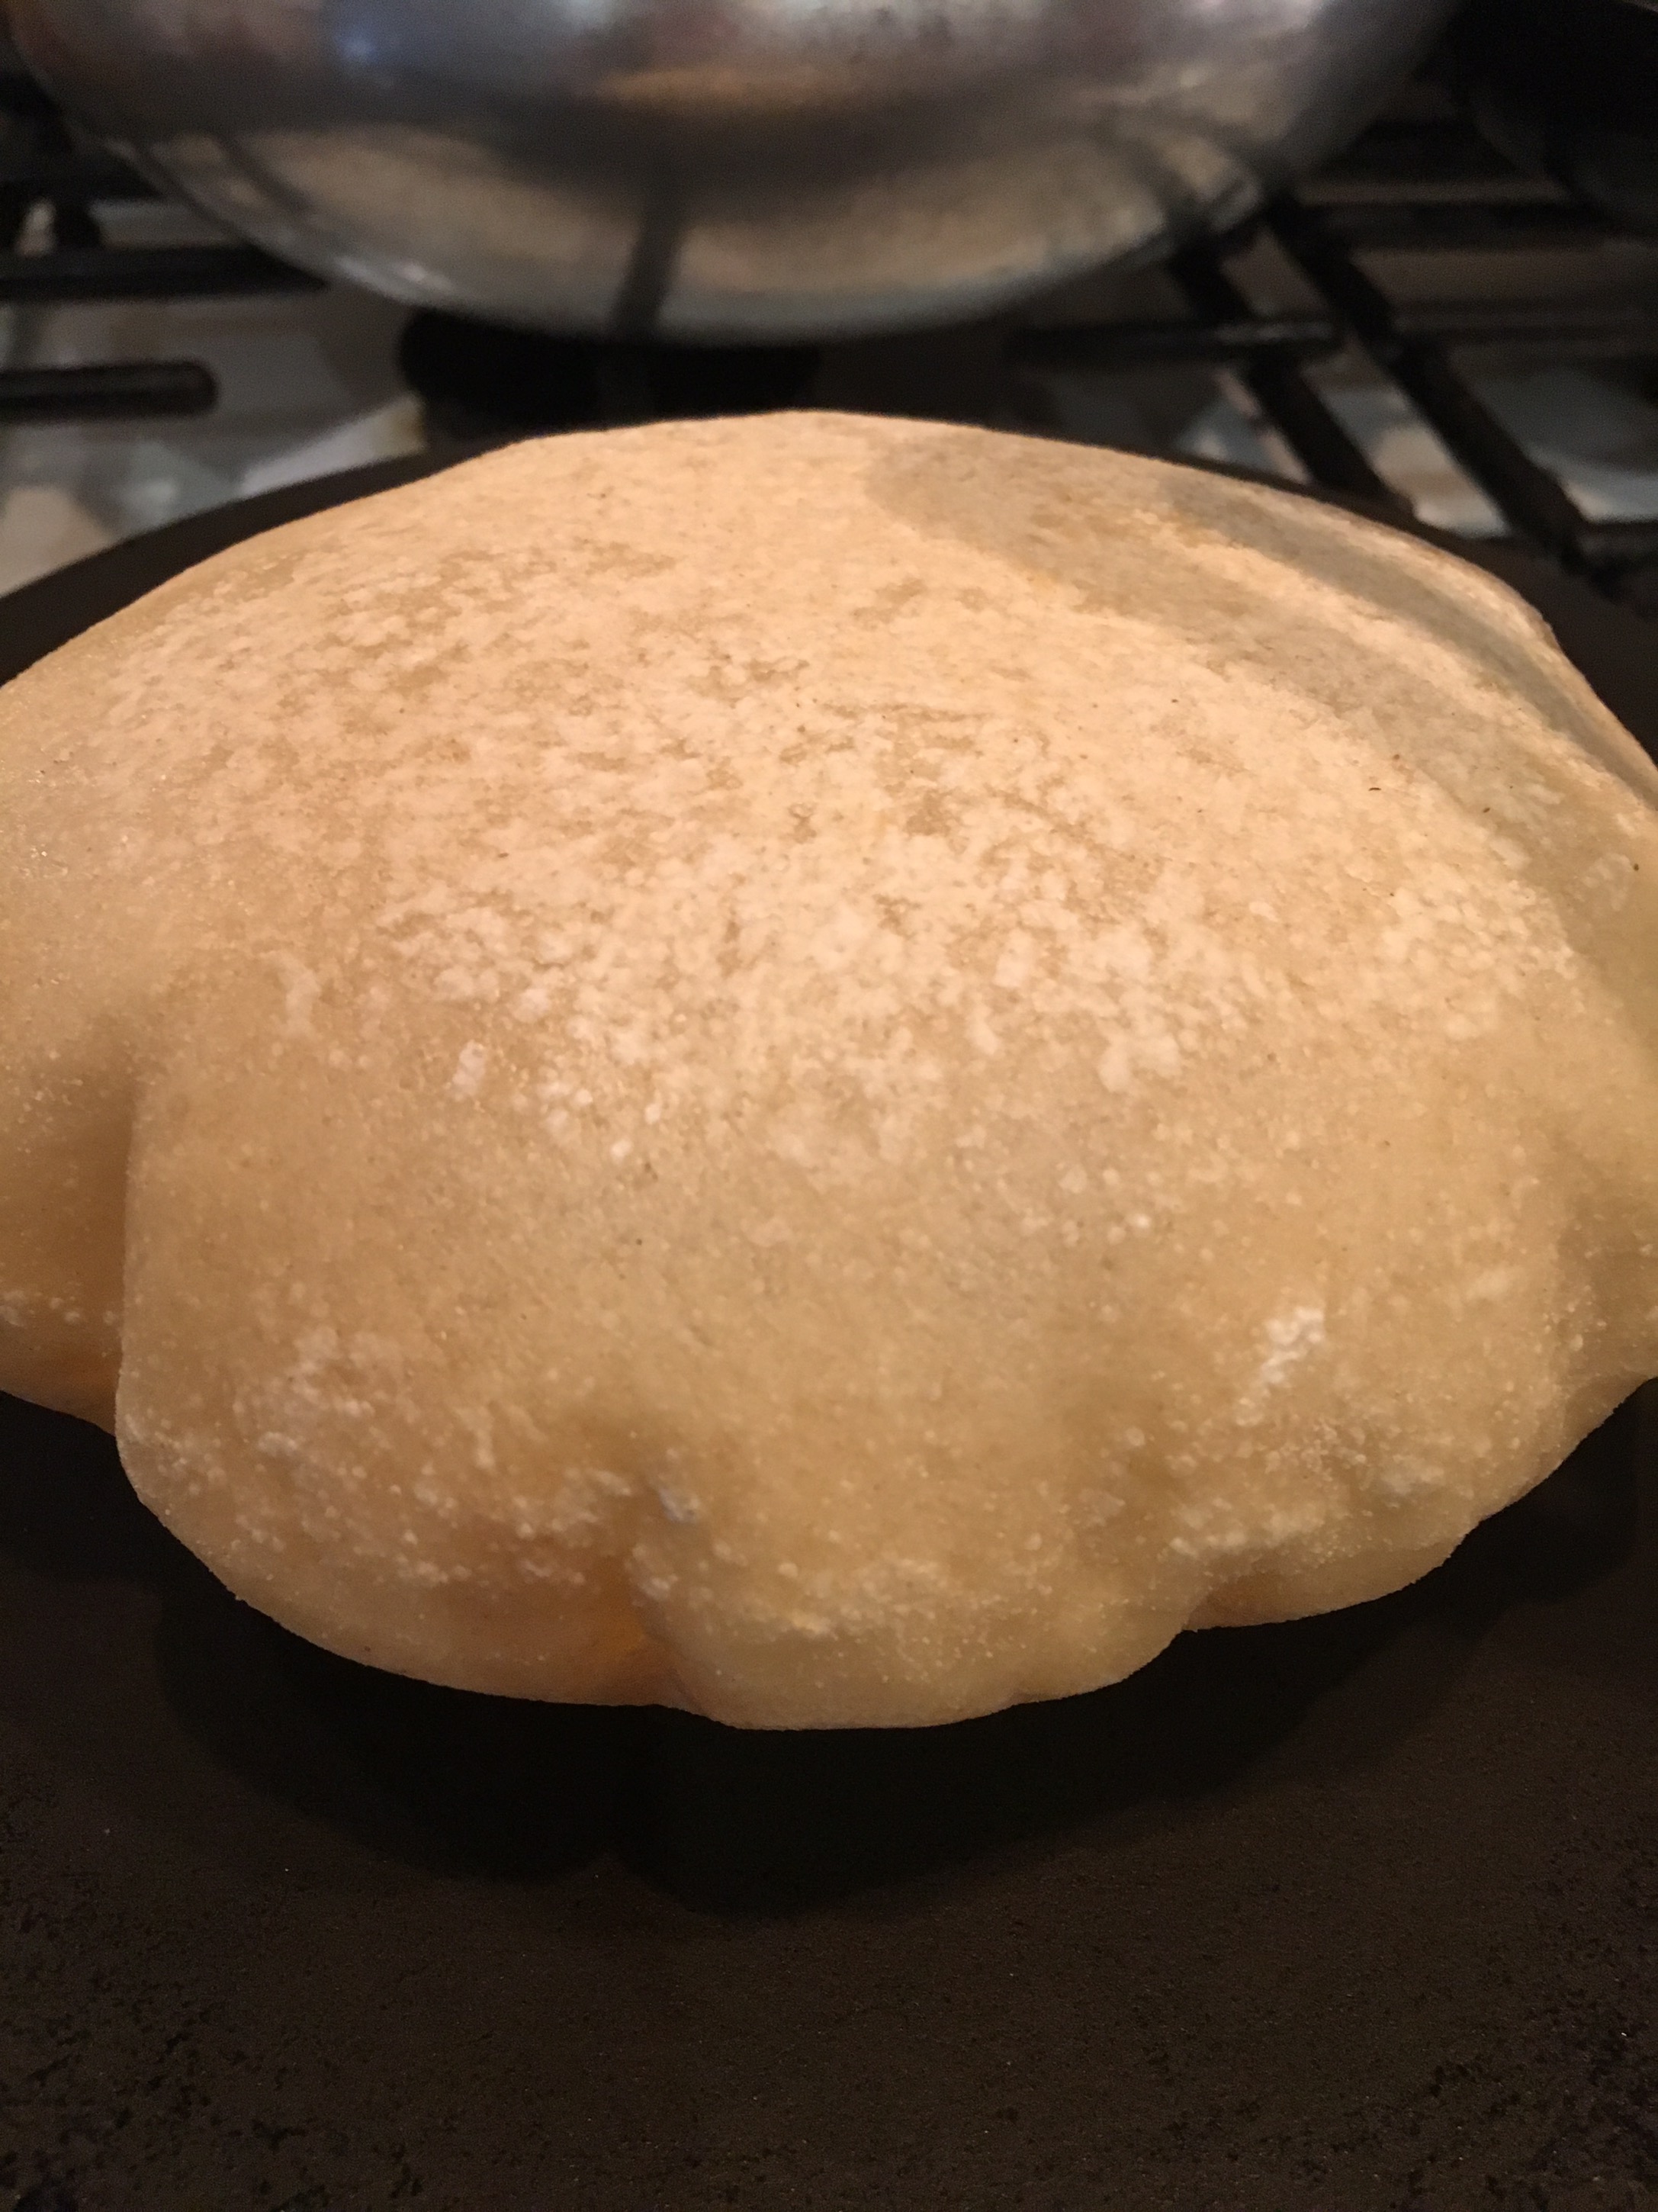
- After 30 minutes or so, heat up a skillet, medium to low flame and cook each bread for about 40 secs in total.As you keep turning and cooking, you will see how beautifully it puffs up. Then take it out and place on clean kitchen towels.
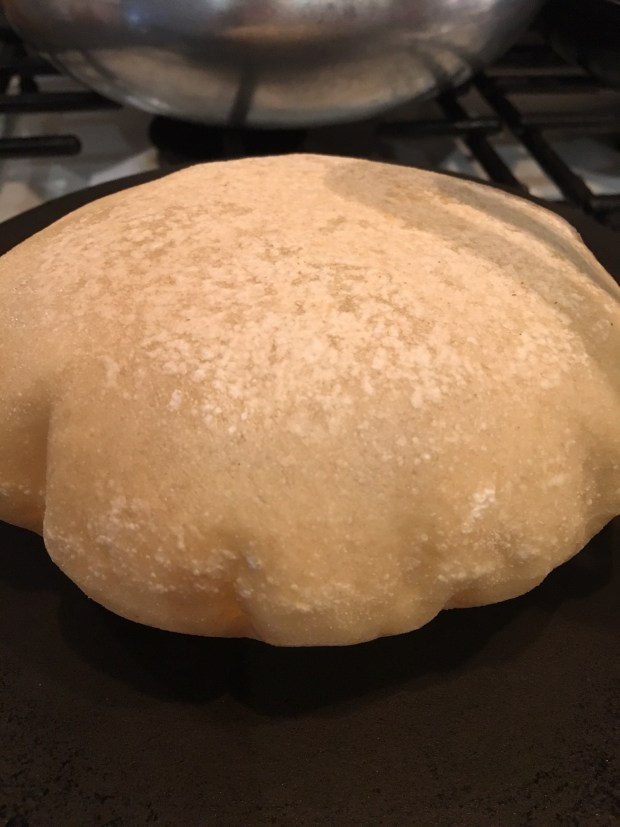
- Don’t stack immediately, wait for it to cool and then stack.
Cover the stacked breads well and store in kitchen towels in room temperature or freeze them in freeze safe bags.
We love yoghurt and anything yoghurt based. And we are also partial to greek yoghurt. SO you can be sure we love Labneh..the strained yoghurt cheese that is just so so so good… When I finished making the breads, I started to crave for a good dip. I quickly took a cup of greek yoghurt onto a muslin cloth and allowed it strain for a couple of hours or so. But the longer you strain, the thicker and creamier it is.
Just before serving, I transferred it to a bowl and drizzled some extra virgin olive oil on top. You can add olives, fresh parsley, fresh oregano, za’tar spice on top of this. I didn’t have any of these in stock. But trust me this stuff is rich and delicious on its own. It is good on toast, good on top of herbed vegetables, or simply get sweeping with some warm homemade pitas like we did.
As we are always greedy and want lots of food, I also made pan fried falafels with whatever ingredients I had. Because, it is not the original recipe without parsley, I will not be posting the recipe for falafels in this post. But there are a lot of websites and youtube videos to learn from.
And this is the final platter I put together for dinner
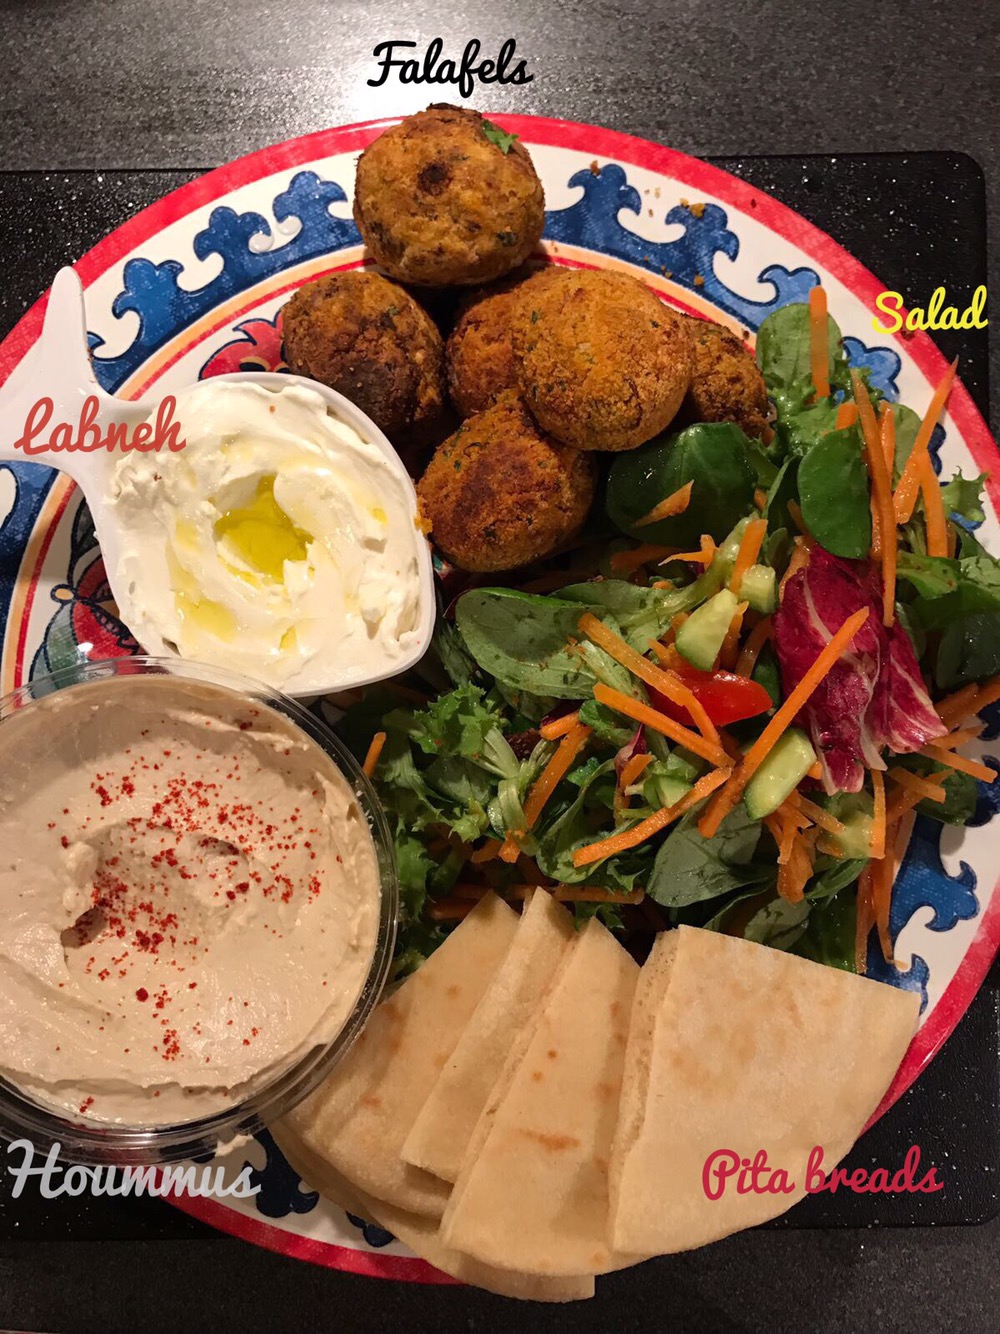
Hoummus- store bought, homemade labneh, homemade falafels and homemade pitas. For the salad, I Had a bag of mixed leaves. To a cup of that I added grated carrots, fresh cut cucumbers and cherry tomatoes drizzled with some olive oil and add a bit of French mustard.
I hope you enjoyed this post!
